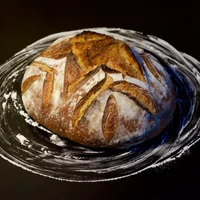
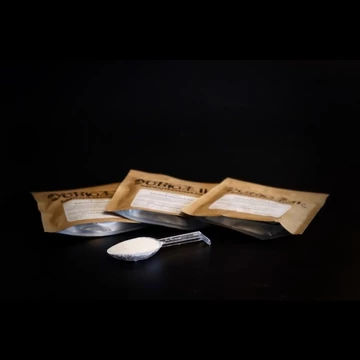
The beauty of our YoBiotik Sourdough Bread Starter is that you don't have to feed it, care about it every day. We carefully collected all of the bacterial and yeast strains for this mixture, so you can easily and instantly work with it. After the inoculation the microorganism starting to work. Braking down carbohydrates, producing flavours, enhancing texture.
Don't worry! It won't be hard, you don't have to kneed it. It doesn't need a tight schedule. It is pretty easy, just you have to understand the reasons of the steps.
You can read more about our Sourdough culture here.
I tried to collect every importance, tips and techniques to ensure your success. So let's see how can you make your own beautiful sourdough bread.
Ingredients:
- 400 g bread flour
- 300 g lukewarm water
- 12 g salt
- 1 measuring spoon of YoBiotik Sourdough BatchCulture
Total fermentation time: 24 hour
Preparation:
1. Mix all of the dry ingredients in a large bowl then add the water to it as well. Mix everything together with a tablespoon. You don't have to kneed it, just mix it enough to wet every dry spots. Let it sit for 15-20 min on room temperature. The first part of the fermentation happens on room temperature which lasts proximately 10-12 hours. It is important to always covering it down to prevent drying.


The reason for that is to give enough time for the flour to get hydrated. In this process the proteins of the flour absorbing as much water as they can.
2. After the flour is properly hydrated the folding process begins. Wet your hands catch the dough, pull it a little and fold it back to it self. Repeat this process for 3-4 times continuously. After that, cover it back and let it sit again at least 30 min.


In this step the goal is, to create new gluten bonds in the dough, you can ensure this by sticking the dough's surface together again and again. The resting is necessary because of the gluten structure. You have to let it relaxing a little, before you working with it again. This way the work is much easier!
3. I repeat the folding process, but this time I grab the whole dough, lift it up, fold it in half and repeat this process for few times.

The goal is to reach an apple like surface. You will see it, in the beginning it's surface will be really bumpy, but after a few foldings and resting, it will be smoother and smoother. At first it will be really sticky, but in the end, It won't stick to your hand at all. Usually I repeating this folding process 4-5 times altogether during the day.

4. If my dough is pretty tight and smooth I'm doing a last gluten structure builder move which called laminating. This is the last step before I put the dough in the fridge. This usually takes place after 8-10 hours of fermentation in room temperature. I put the dough on a wet flat surface and trying to flatten it as big as I can by gently pulling its sides away. My aim is to create as big surfaces as I can without taring the dough. This needs a little patient and practices, but you will see, this step is pretty satisfying. Sometimes I can flatten the dough as big as the size of an A3 paper.


If it's ready I'm folding the dough into thirds to get a long stripe as wide as my banneton is. If it is getting sticky, just wet your hands again, it will help!


Then rolling it up tightly. Flouring it and the banneton as well to prevent from sticking. This is the first time when I am using flour to prevent sticking before that I always use water.


5. I put the rolled up bread dough into the banneton basket, covering it and put it into the fridge for 10-12 hours. In this time the fermentation continues, our bread getting more tastier! :)

Baking:
For the baking, there are many options you can choose from. The important criteria are, you have to ensure the proper amount of steam in your oven and high enough temperature. We need the steam, to prevent crust formation of the bread so it can expand bigger and bigger with more and more holes in the inside. The reason of the high temperature is the same. When we put our bread in the hot oven the crust formation and water evaporation in the inside starts. If the temperature is higher, the water evaporation will be faster and it makes expand the bread. If the temperature is not high enough, the crust formation will be faster and our bread won't be able to expand and it will break. This is the same reason for the Neapolitan pizza high baking temperature. In the mean time we have to save our bread from direct heat to prevent burning. After we reached the proper size an interior structure of our bread, we should lower the temperature, remove the steam from the oven to support crust formation because nothing is better then a fresh hot bread with crunchy outside and light and soft inside. If we reached the wished crust, our bread is ready. After a few minutes of cooling, it is ready for tasting! :)
Okay, let's see some example techniques for the baking, but please if you have any better idea, do not hesitate to test it and also share with me, I'm curious! :)
You can use a clay cooking pot with a lit, dutch oven, bread cloche or a simple heat resistant pot. In this case pot ensures the proper amount of steam and protects our dough from direct heat. So if you choose this technique these are the steps:
1. Turn on your oven to 260 °C or to the maximum temperature and put in the pot what you chose for the baking. Let it warm through properly.
2. Empty your banneton into the hot pot. Be careful, don't burn your self! Then score the dough with a razor blade or a with a sharp knife. One simple cut in 45° to the surface the dough. Decrease the temperature to 250 °C and bake it for 25 min.
3. Remove the lit and lower the temperature to 210 °C for 15 min or until you get a beautiful golden brown crust. So the total baking time is proximately 40 min.
My personal preference is to use a pizza stone, but you can use a simple tray as well. In this method we can ensure the steam with the steam function of the oven or if your oven doesn't have it just simply put a heatproof pot filled with water in the bottom of the oven. For the direct heat protection we can use a simple baking tray. Just insert it upside down in the top of the oven.
1. Turn on your oven to 260 °C or to the maximum temperature and put the pizza stone and the pot filled with water in. Let it warm through properly.
2. Empty your banneton on the hot pizza stone. Score the dough with a razor blade or a with a sharp knife. One simple cut in 45° to the surface the dough. Put in the upside down tray to the top. Decrease the temperature to 250 °C and bake it for 25 min.


3. Remove the tray and the water pot. Lower the temperature to 210 °C for 15 min or until you get a beautiful golden brown crust. So the total baking time is proximately 40 min.


Few tips:
Every flour is different, I recommend to choose one flour and stick with it. You can check the protein content of the flour. Higher the protein content, more water can be absorbed. I used BL80 flour with 12,5 g of protein content / 100 g of flour. If you feel your dough to soft, try it with less water in the next time. If you feel it can absorb a little more, then you can add more water. More water means more fluffier bread.
If you have too large wholes in your bread, then you didn't fold it enough or you should roll it up tighter in the lamination step.
If you don't have a banneton, don't worry! you can make a rootbread as well. It is also delicious. In this case after the lamination, put the dough back in the bowl, then in the fridge. Just take it out before the baking. Stretch a little, then twist it and put it in the oven to bake.
You can make your bread even tastier with adding some extra flavour to it. My favourite is adding Cheddar cheese and pickled jalapeno to it. But dried tomato, or fried onion is also a pretty good choice!
I usually start the bread making at the morning. I mix the dough, then folding it few times before work. It is just a few minutes really! :) I folding it again for few times after I arrived home in the afternoon. Just 2-3 foldings with 30-60 min resting then I laminate it and put it in the banneton. So don't worry! It is not a problem if you don't have the whole day for bread baking! I don't have either, but bread baking is more about patient instead of kneading.
You can always give a little spritz of water to your dough after the scoring step. This way you can delay the crust forming a little more and this will remove the unnecessary flour from the surface of the dough. With this technique you can get a clean beautiful golden brown crust after the baking.
 Lactic cultures
 Ingredients
 Cheese moulds
 Supplies
 Kits
Kits
